
When installing tiles, grout helps give floors and walls a polished look while providing stability and protection. However, knowing the best time to sponge away excess grout can determined whether your floors and walls have the refined look you’re seeking or end up uneven and grainy.
Generally speaking, grout requires 15 to 30 minutes at minimum to set before wiping away any excess, but there are a few things to know about the material before you reach the point of sponging it.
Below, I explain the importance of grout, how to use it, and exactly how long you should let grout set before sponging.

What is Grout and Why is it Needed?
Grout is a mixture typically composed of cement, water, and sometimes sand or other additives. It’s used to fill the gaps between tiles to create a clean, uniform appearance and to prevent dirt and debris from getting under the tile. It also helps to secure the tiles, adding firmness.
Today’s Homeowner Tips
If the spaces are more than 1/8 inch, I recommend that you use sanded grout.
Types of Grout
The project, location, and the width between the titles can dictate the best grout for the job. Three of the most common types of grout include sanded, unsanded, and epoxy.
Sanded grout contains fine sand for added strength. It’s less prone to cracking under pressure and is best for joints wider than ⅛ inch. It’s commonly used for floor tiles and other areas where the joints are wide but may scratch softer materials if used in narrower joints.
Unsanded grout is ideal for narrow joints. It’s smoother and less likely to scratch delicate tiles than other types. It’s also easier to work with on walls and other vertical surfaces for a fine finish.
Epoxy grout is highly durable, chemical-resistant, and stain-resistant, making it perfect for areas exposed to moisture or chemicals, such as kitchens or bathrooms.
How to Properly Grout Tiles
With the right tools and techniques, grouting tiles can be a manageable DIY project.
Before you get started, you’ll have to have some supplies on hand like a:
- Grout mixer drill attachment
- Bucket of water
- Appropriate grout for your project
- Grout float
- Putty knife
- Sponge
- Clean cloths
- Grout sealer
Once you’ve gathered your supplies, you can get started with the project with a few simple steps:
1. Prepare Your Grout Mixture and Let It Slake
Mix the grout according to the manufacturer’s instructions. Work in small batches to prevent the grout from drying out. After mixing, let the grout slake (or rest) for about 10 minutes to allow the chemicals to activate and create a smooth consistency.
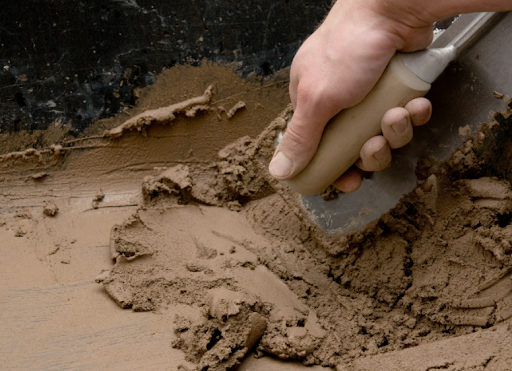
2. Apply Grout Using a Grout Float
Hold the grout float at a 45-degree angle and spread the grout across the tile surface, pressing it into the joints. Work in small sections, filling all gaps completely.
3. Allow Initial Set Time
Let the grout set for 15 to 30 minutes before proceeding to the next step. The grout should lose its sheen and harden slightly.
4. Remove Excess Grout Using a Sponge
Dampen a grout sponge with clean water and wring it out well. Wipe diagonally across the tiles to remove excess grout without disturbing the grout in the joints. Rinse the sponge frequently and change the water as needed.
Wait about three hours, then repeat this step.
5. Final Wiping and Clean-Up
Allow the grout to dry completely overnight. Use a dry cloth to buff away any remaining haze on the tile surface. Don’t use a wet cloth or sponge, or you may moisten the grout and disturb its curing.
Over the next 24 to 72 hours, avoid walking in the space to protect the newly applied grout. Keep the area dry and free from dirt or debris, as moisture and contaminants can interfere with the curing process. You should also maintain the room’s temperature and humidity to avoid uneven curing.
6. Apply Sealer
After the grout has cured completely, apply the sealer with a sponge. Wait 10 minutes and wipe off the excess sealer with a damp towel.
Next, test the sealant with a few drops of water. You’ll know the grout’s sealed if the water beads up, but if it doesn’t, wipe off the water, wait 30 minutes, and then apply a second layer of sealant.
How Long Should You Let Grout Dry Before Sponging?
When grouting, you should first let the grout dry for 15 to 30 minutes before sponging. You’ll want to repeat this process after three hours. After the grout sets overnight, you should use a dry cloth to remove any additional unwanted grout.
If the room is humid or cold, the grout can take longer to cure, whereas warmer, low-humidity rooms allow grout to dry more quickly. The size of the grout can also impact set times, with thicker lines taking more time to dry than narrow lines.
As you work, you’ll likely want to clean up the excess grout right away. However, if you wipe grout before it has had time to set properly, you can weaken the lines, causing them to shrink or crack. You could be left with uneven grout lines and or dislodged grout, so I recommend avoiding the urge to rush the process.
If you’re ever unsure about the recommended set times, follow the grout manufacturer’s instructions.
Grouting Tile Tips
For the best results, keep these tips in mind:
- Use the right amount of grout. You’ll have some excess, but using too much wastes the product and creates a mess. Apply just enough to fill the joints completely without excessive overflow onto the tile surface.
- Avoid intense scrubbing. Scrubbing too hard can damage the grout before it’s fully set. Use gentle, circular motions when cleaning to preserve the integrity of the grout lines.
- Allow mixed grout to rest. Slaking activates the chemicals in the grout, ensuring better performance and finish.
- Seal porous tiles before grouting. Apply a sealer before grouting to prevent porous tile staining.
- Use the right type of grout. Mismatched grout can lead to poor adhesion and durability issues.
- Clean tools between uses. Dirty tools can contaminate the grout and affect the finish.
- Always apply sealer. Unsealed grout is more prone to stains and moisture damage. The sealant also prolongs the grout’s lifespan.
- Don’t touch grout as it cures. It can be tempting to check if the grout is dry, but touching it can damage the lines. If you’re unsure if it’s set, wait at least 72 hours. Wet grout will also be darker than dry grout.
How to Maintain Grouted Tiles
To keep your grouted tiles looking great for years to come, clean them regularly with a pH-neutral cleaner, avoiding harsh chemicals that can damage the lines. Address any stains, cracks, or loose grout right away to prevent discoloration and water damage. Grout should be resealed annually or as recommended by the manufacturer.
Final Thoughts About How Long to Let Grout Set Before Wiping
While the general rule of thumb is to let the grout set for 15 to 30 minutes before wiping, factors such as temperature, humidity, and grout type can affect this timing. I recommend that homeowners looking to complete this DIY project should pay close attention to the grout’s consistency more than how much time has elapsed and follow manufacturer guidelines for the best results.


Leave a Reply